Flowers for birthday

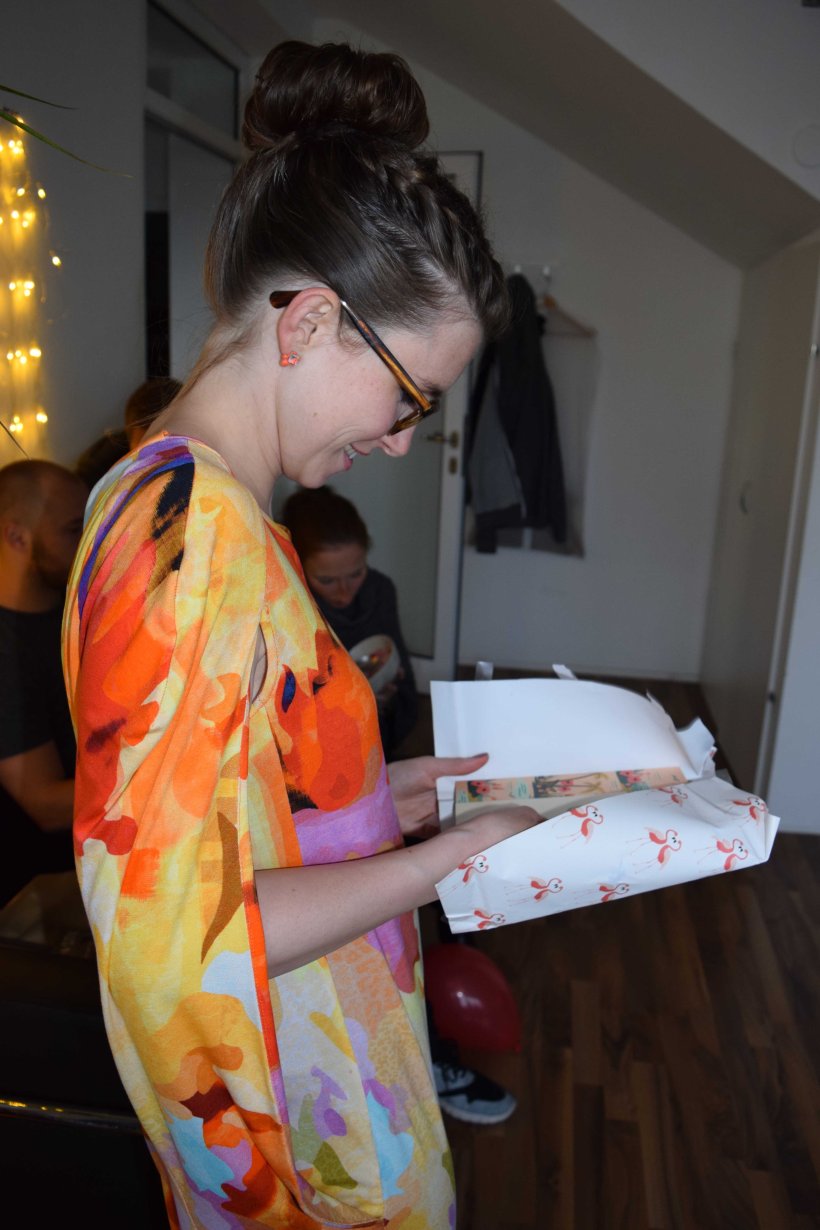
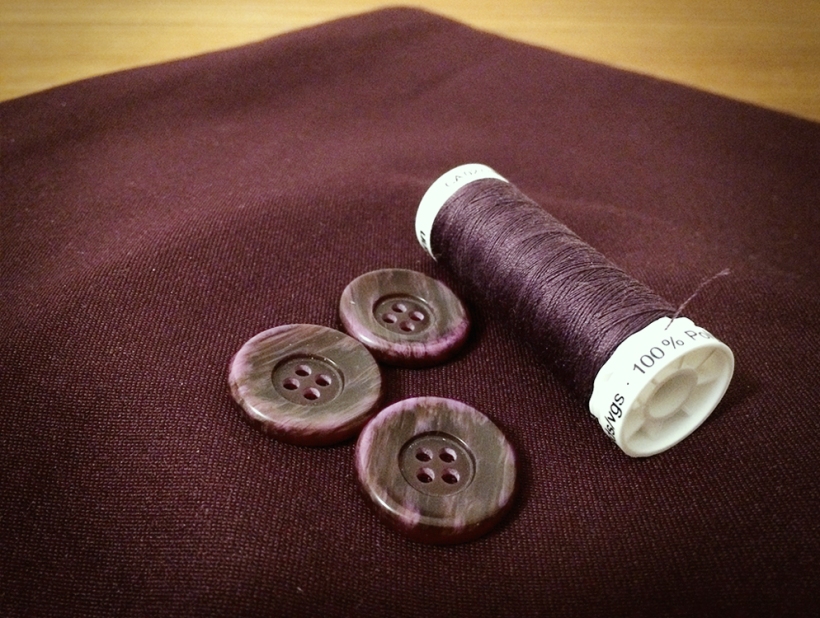
It’s pretty normal to get flowers for birthday. Meanwhile it is almost as normal for my friends to give me fabric or a voucher for fabric for my birthday too. 🙂 Lucky me.

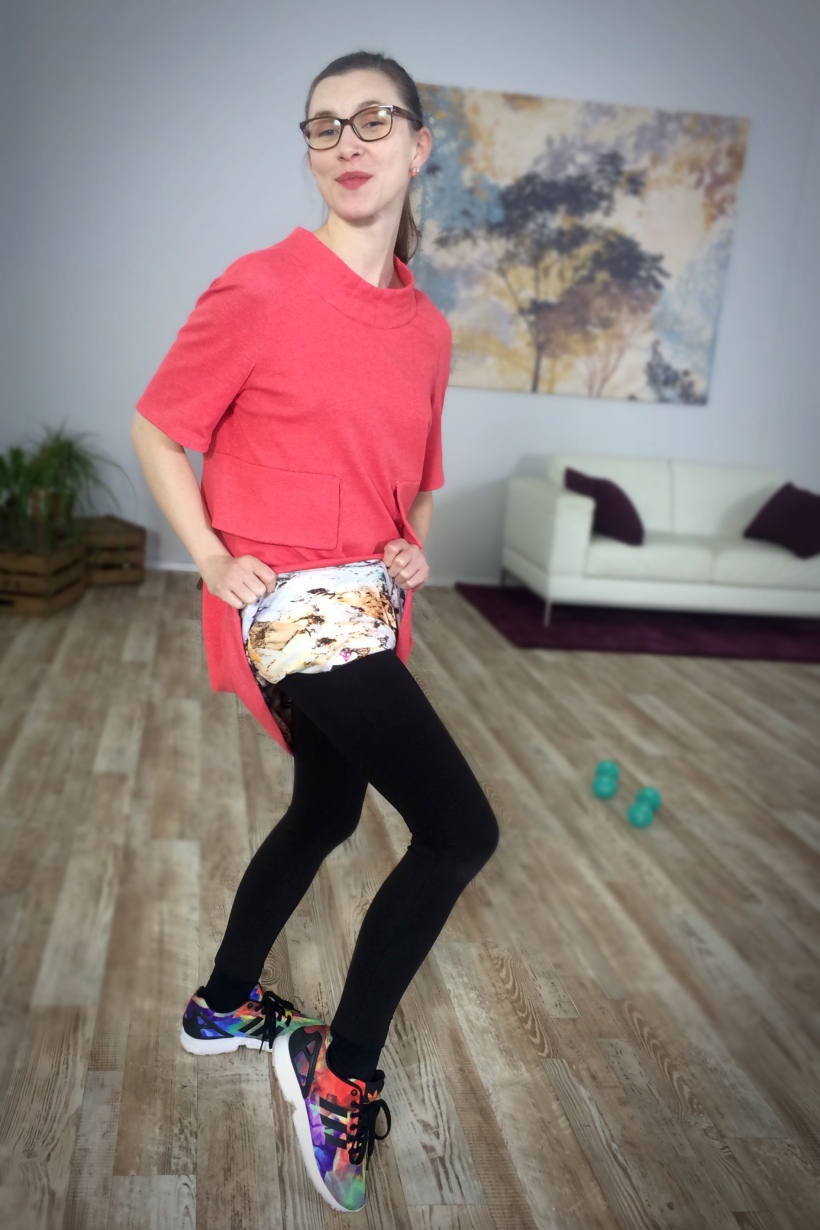
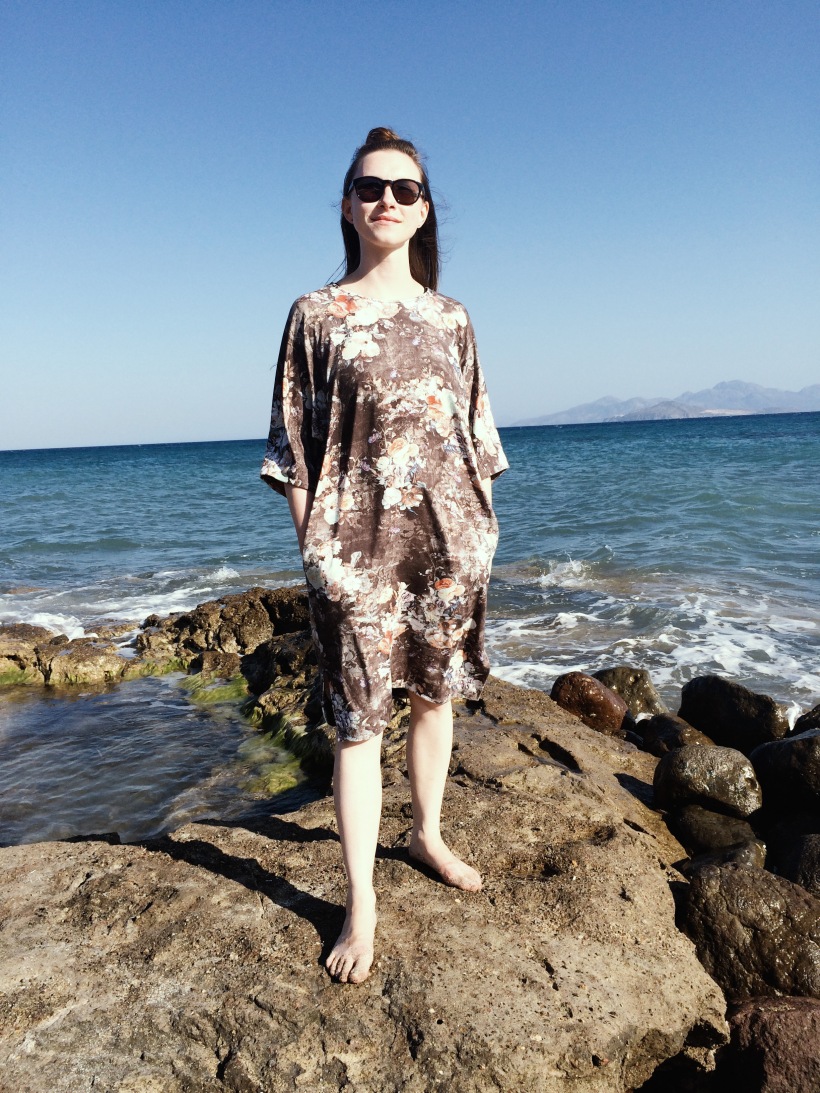
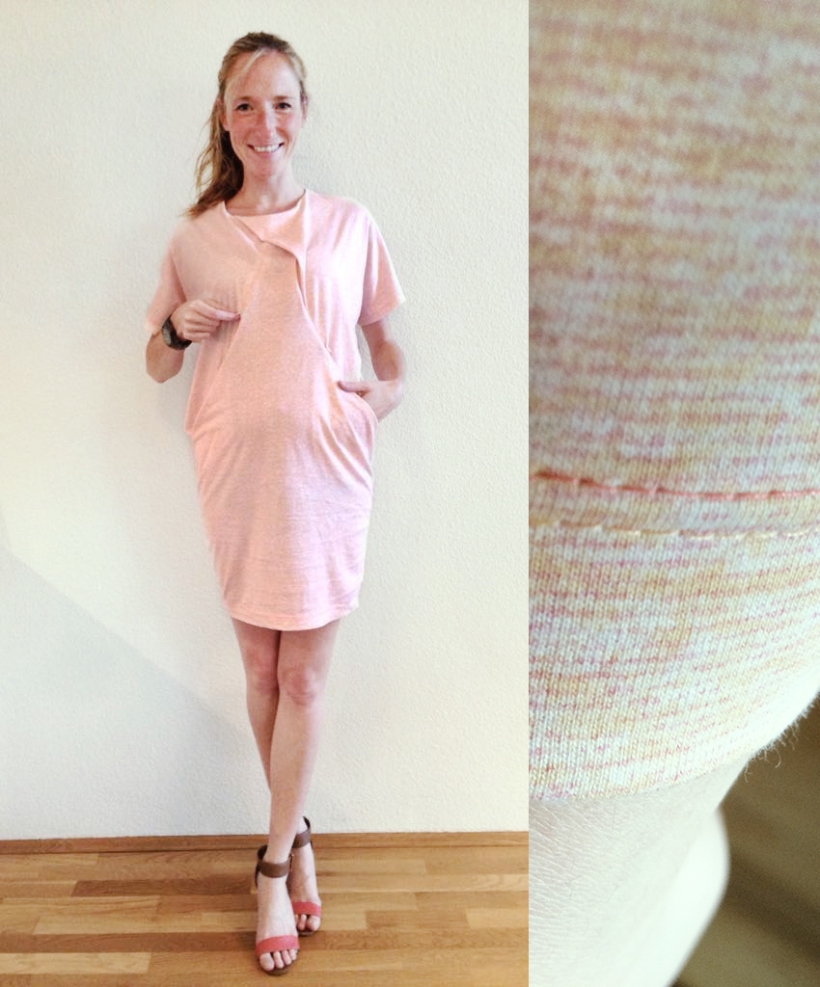
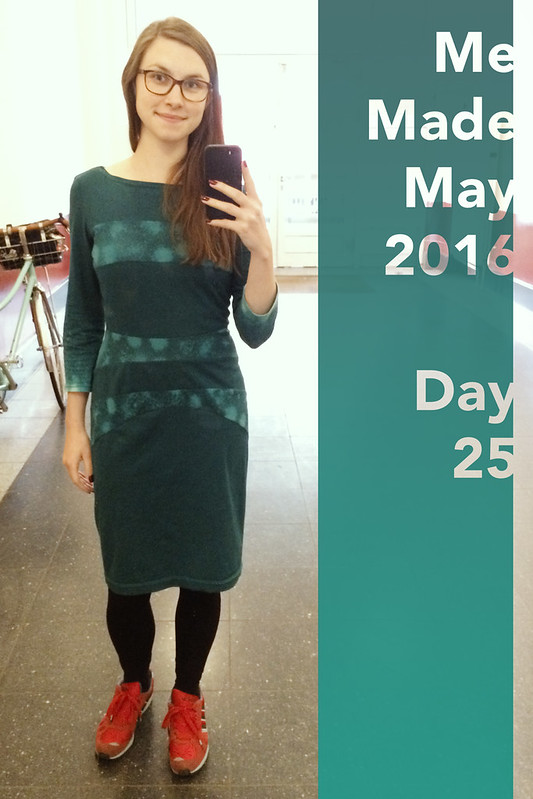
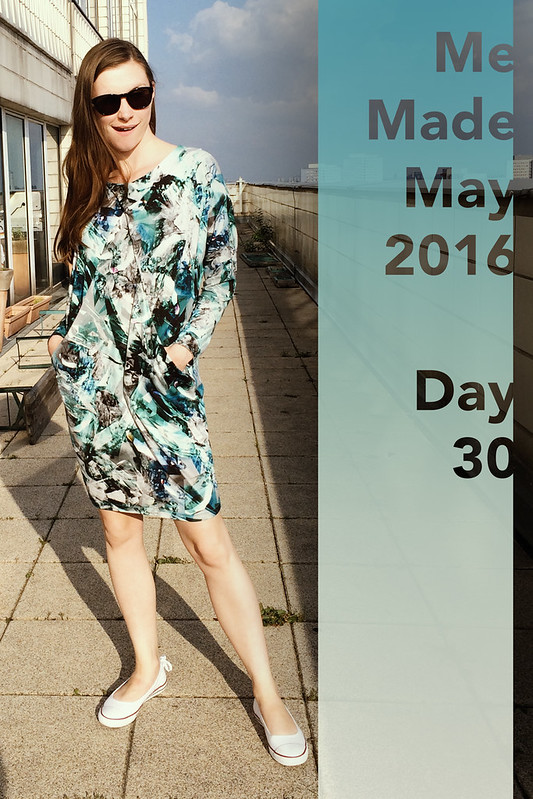
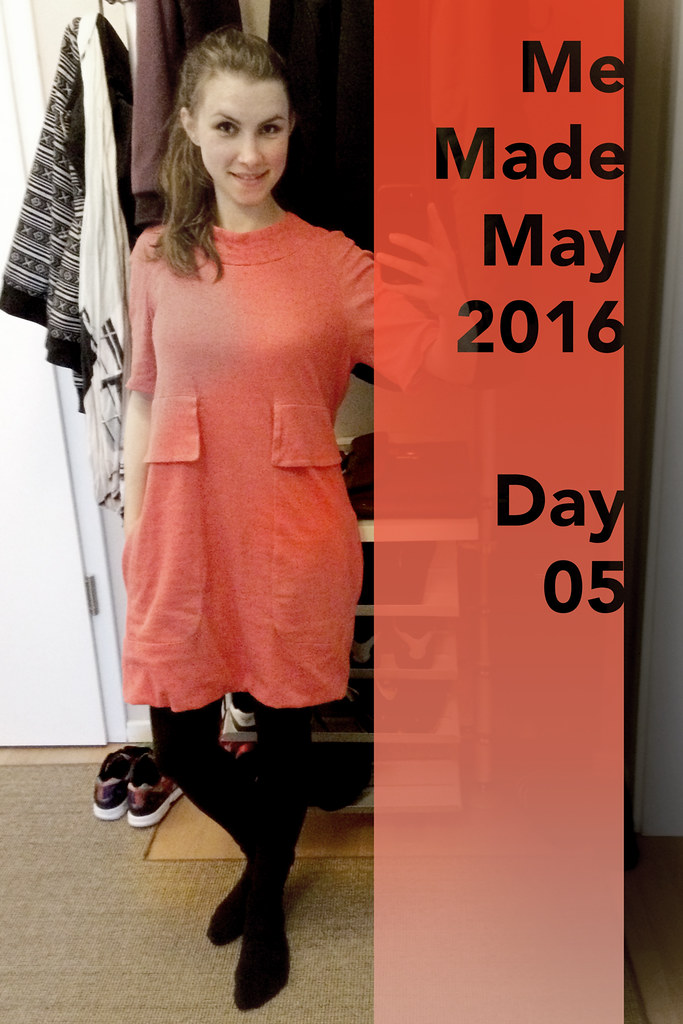
It must have been two years ago when I got this lovely floral Jersey. For me it is always interesting to see what people think I might like. Jersey is always a good choice. And those colours… just perfect! (I try to stay in my autmn colour palette… but sometimes I get carried away by a nice pattern or the structure of a fabric)

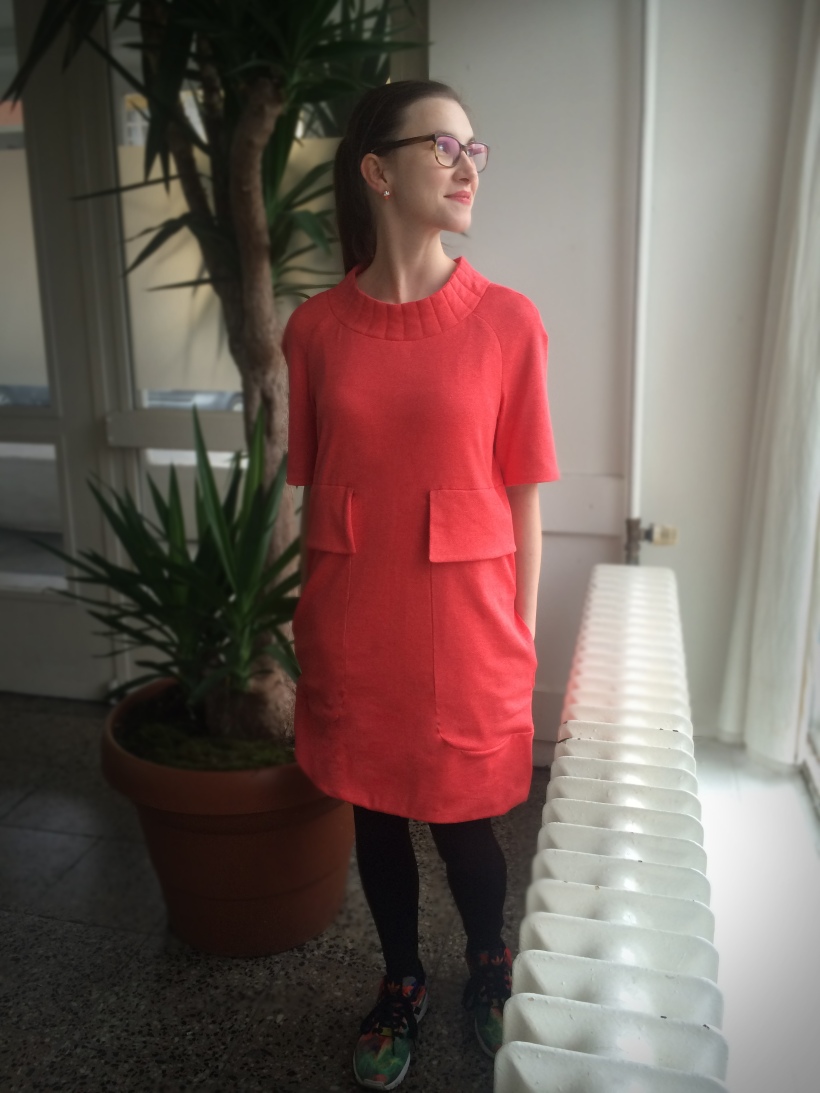
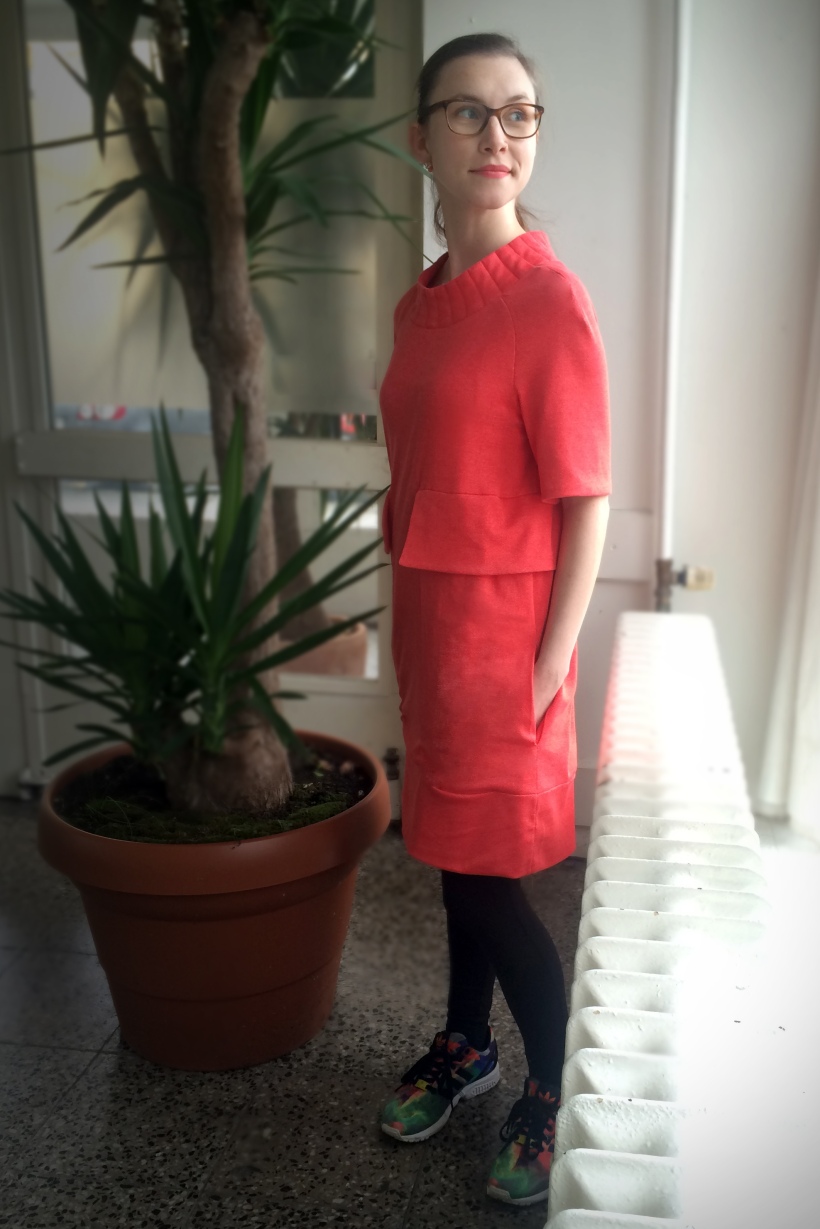
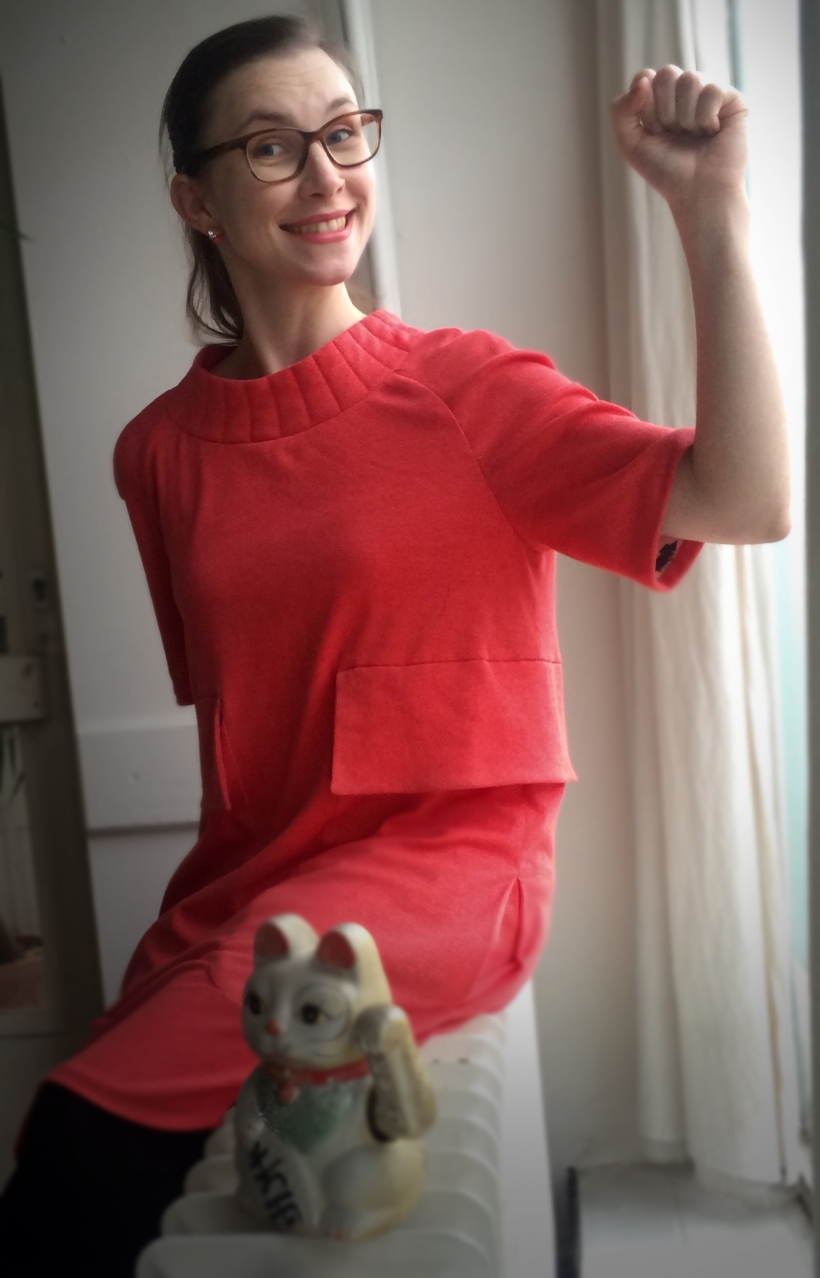
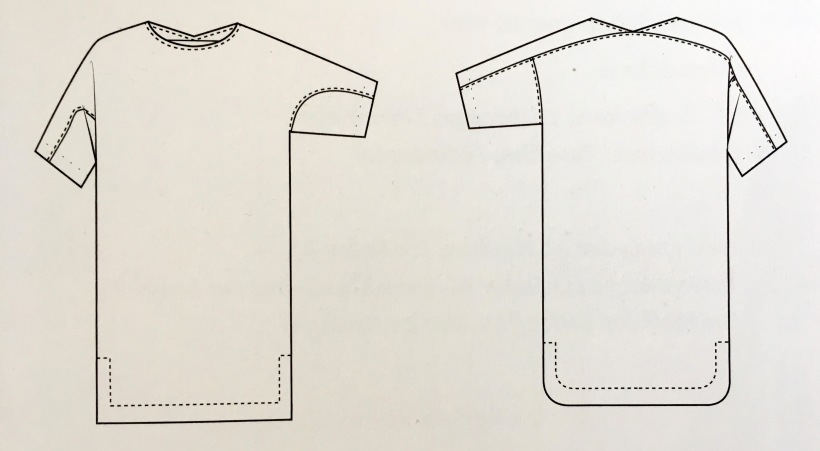
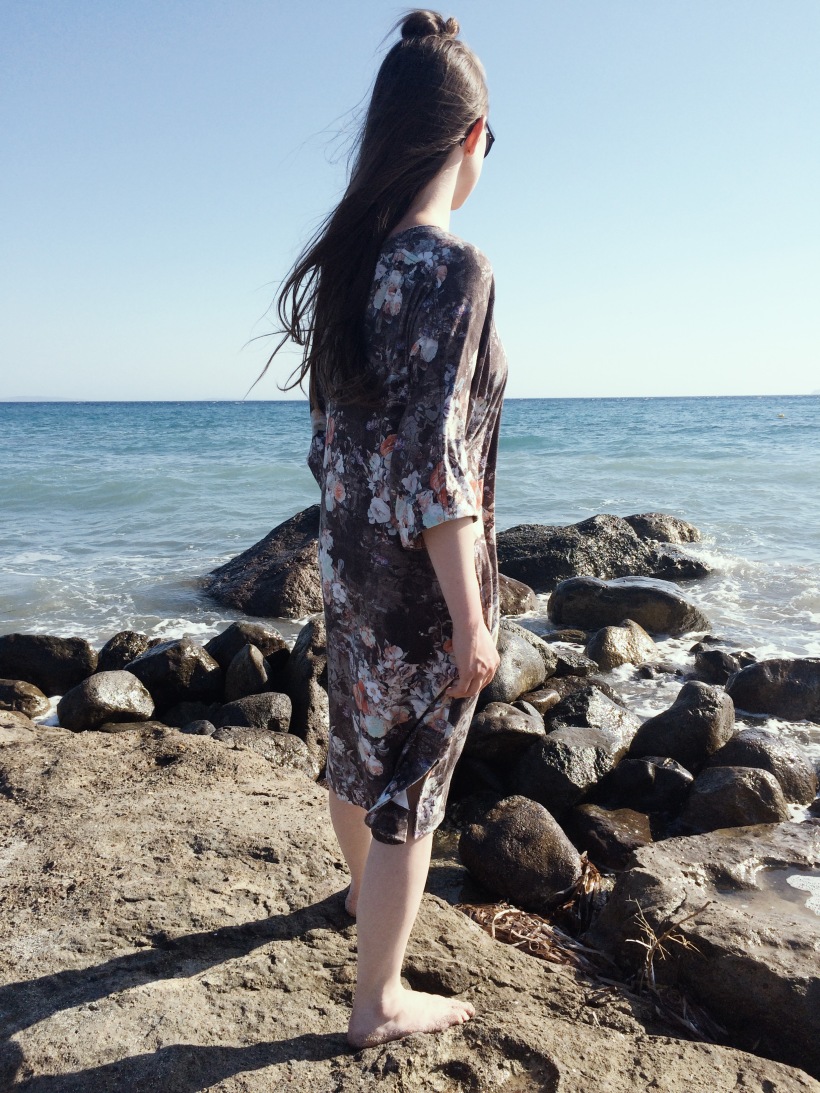
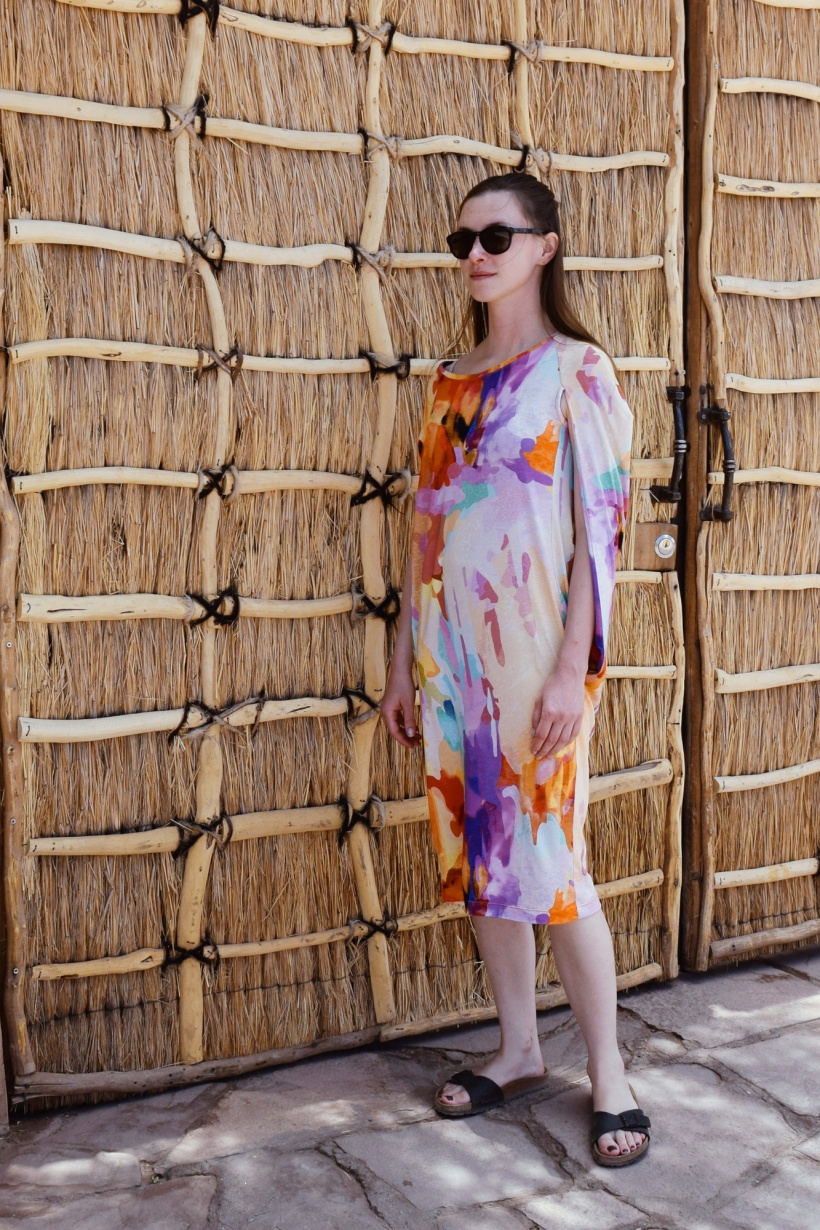
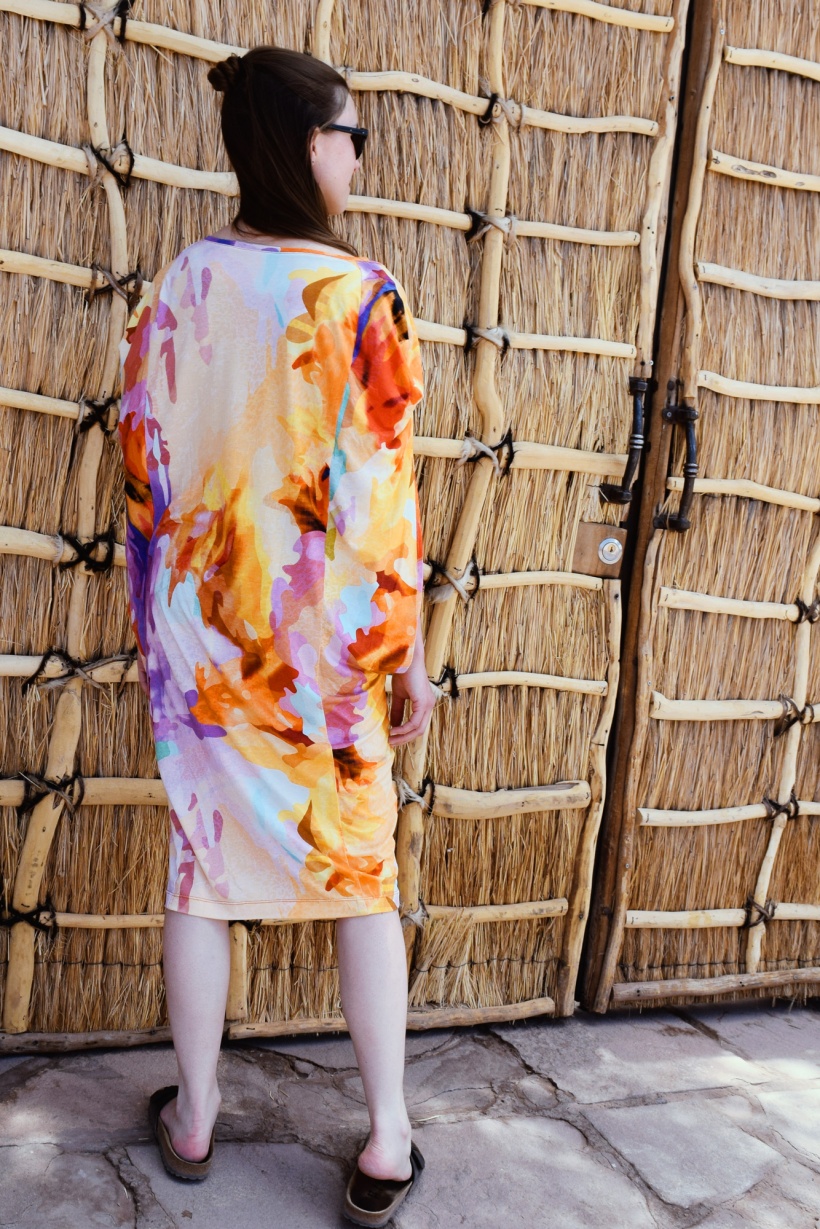
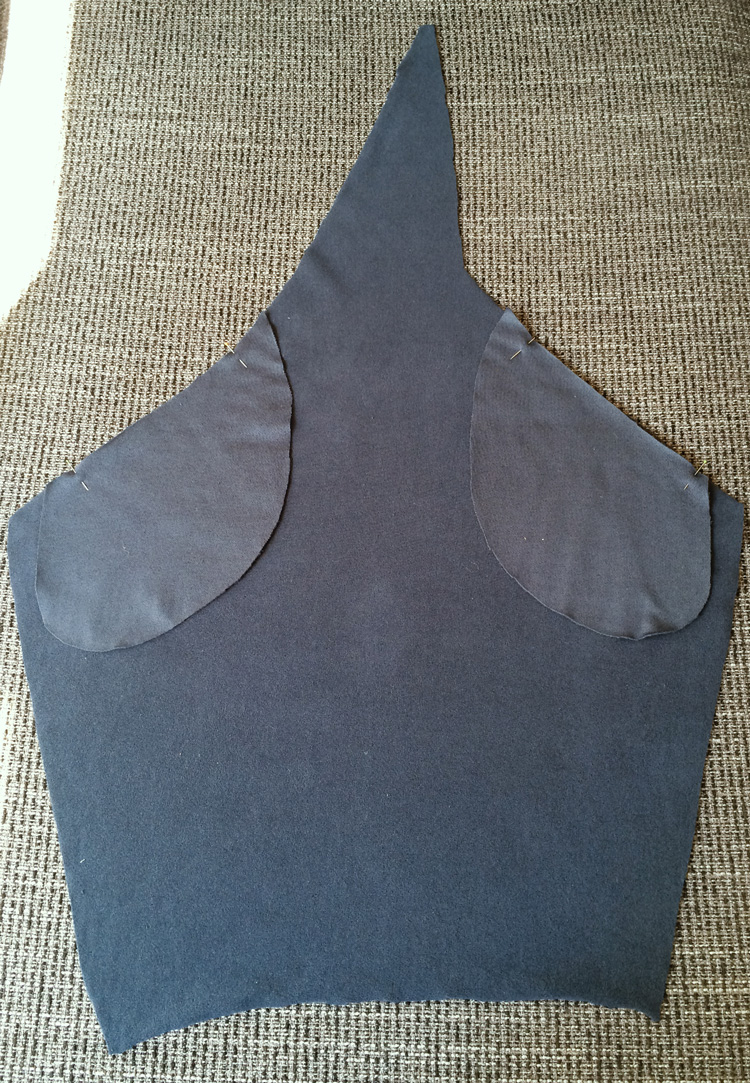
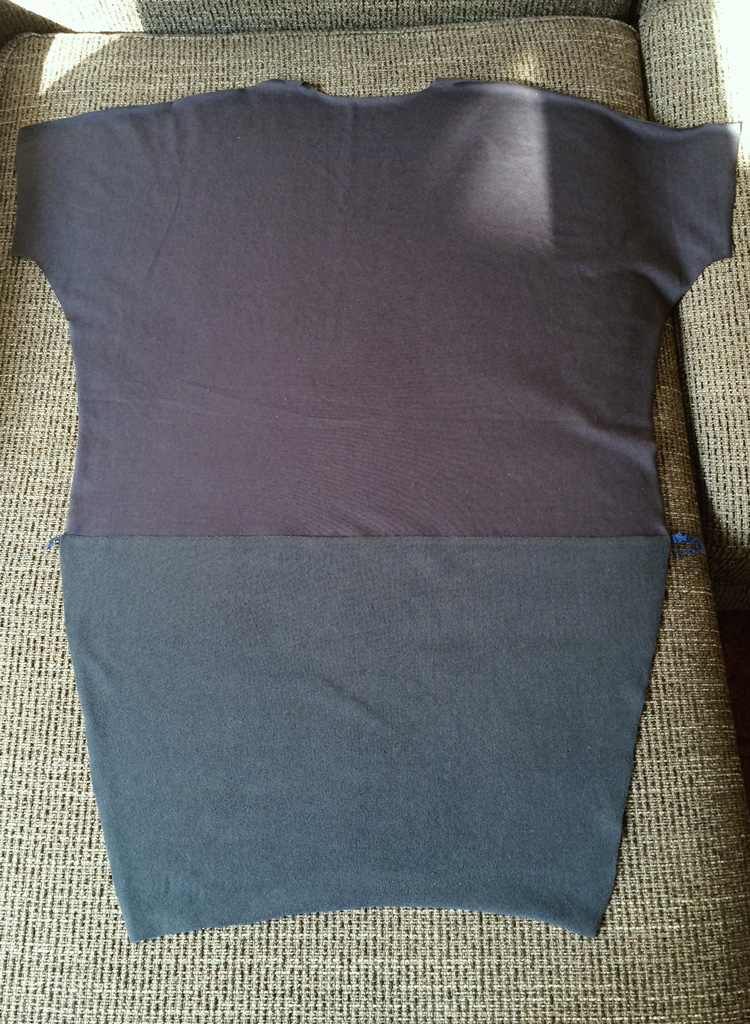
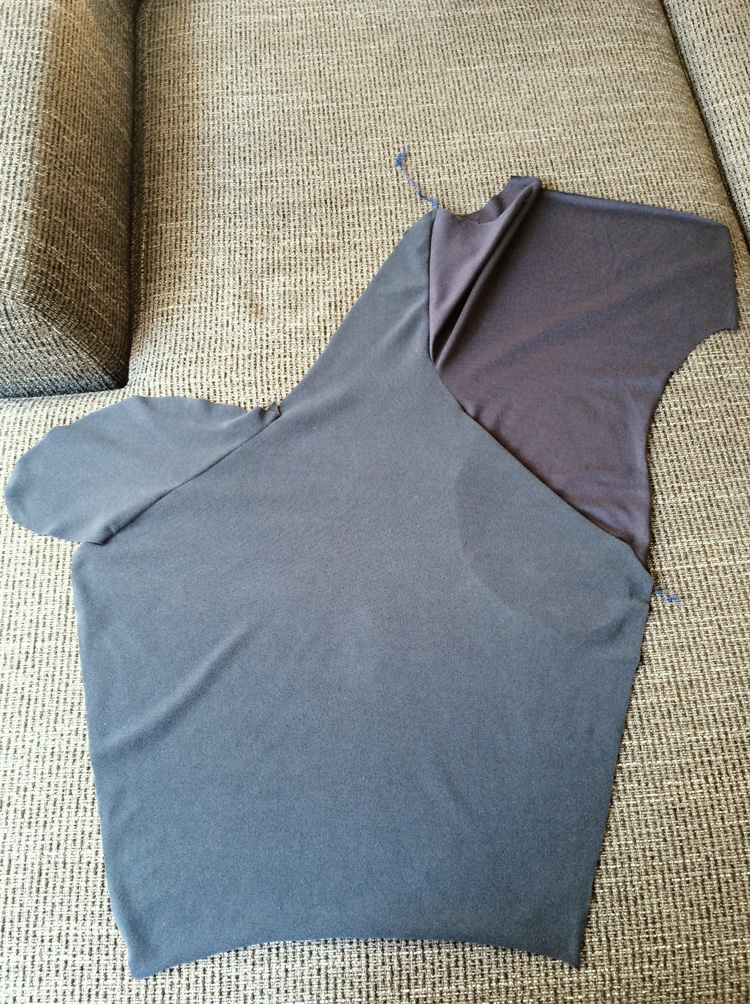
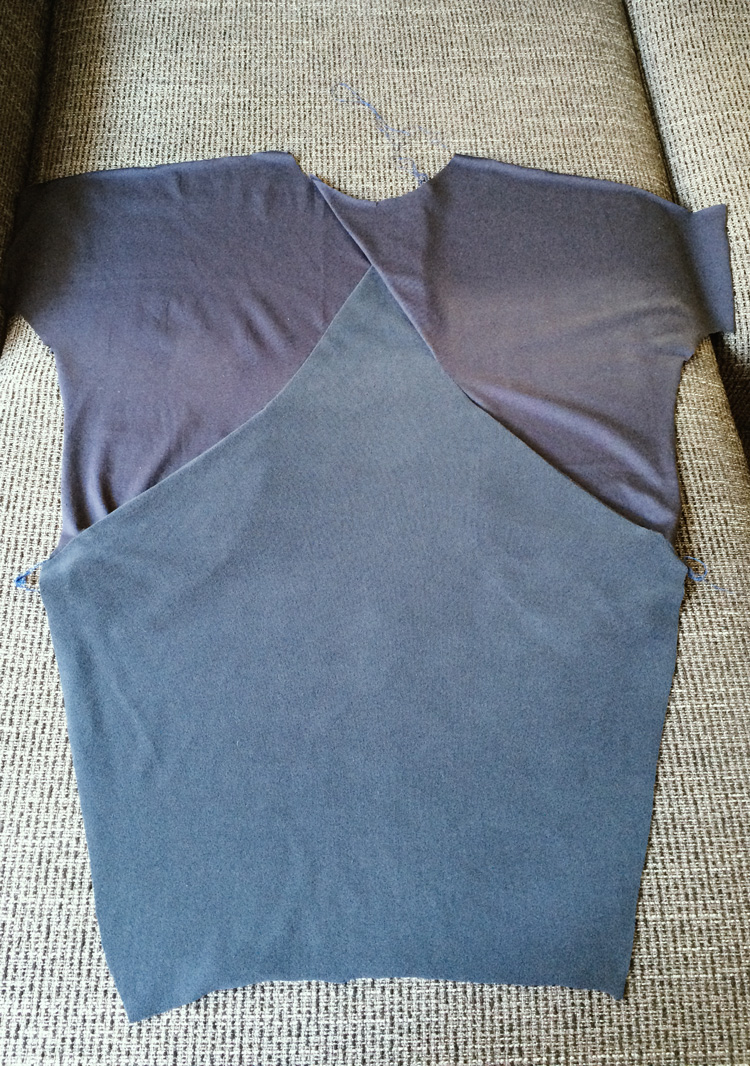
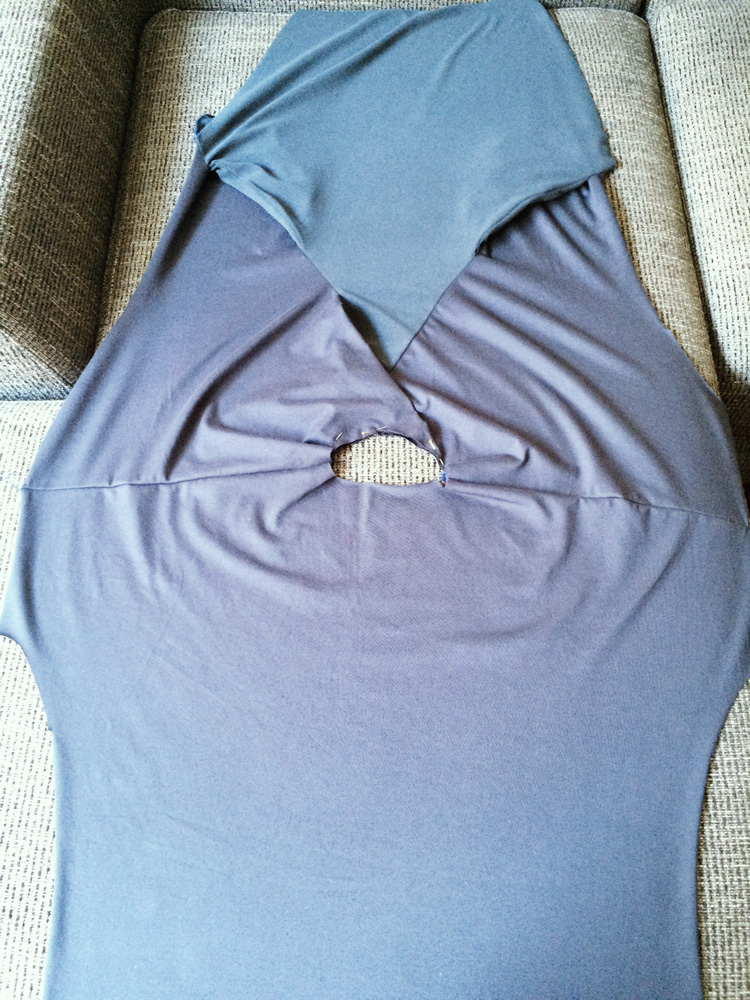
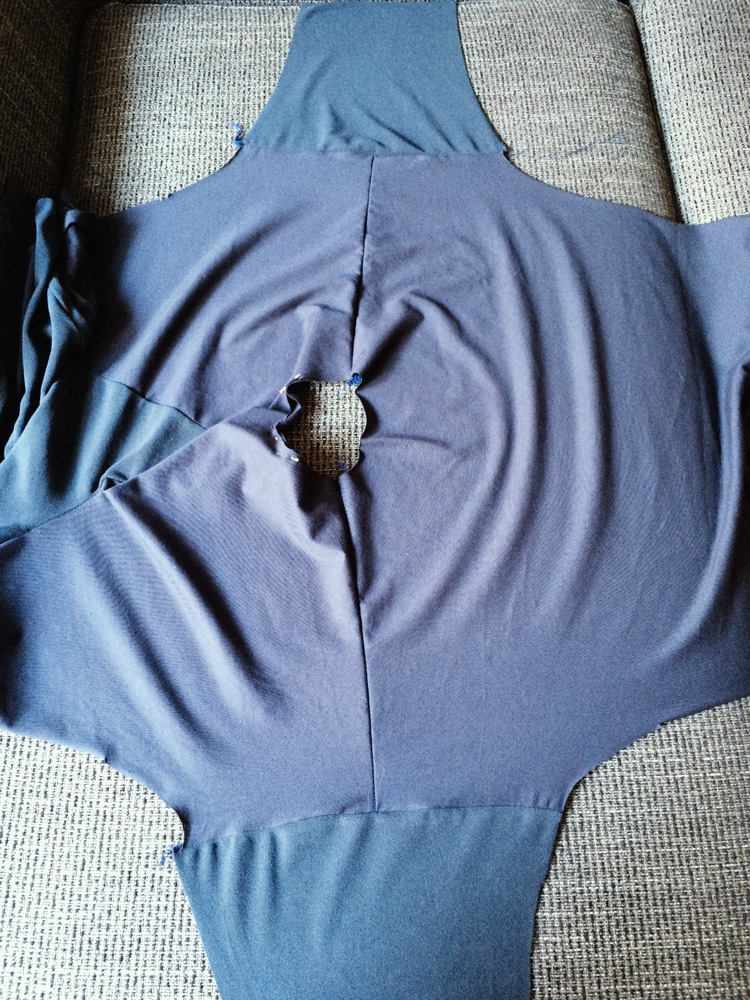
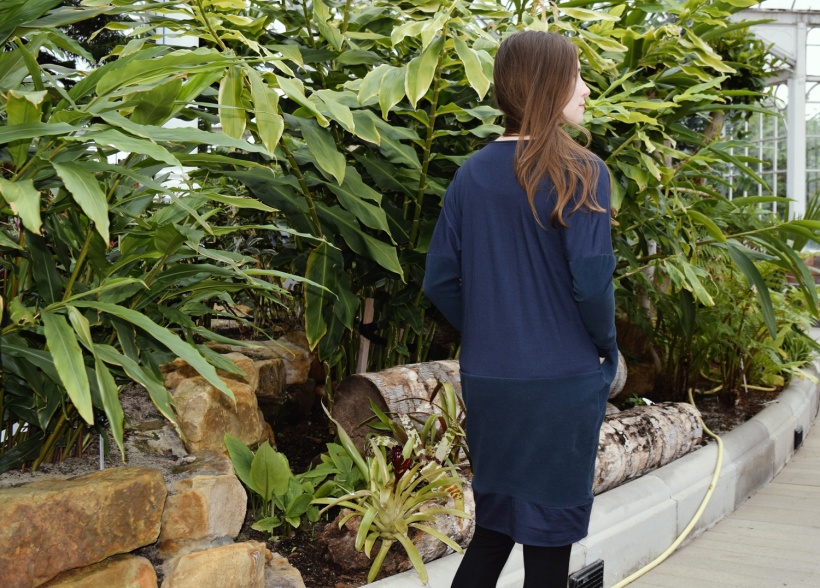
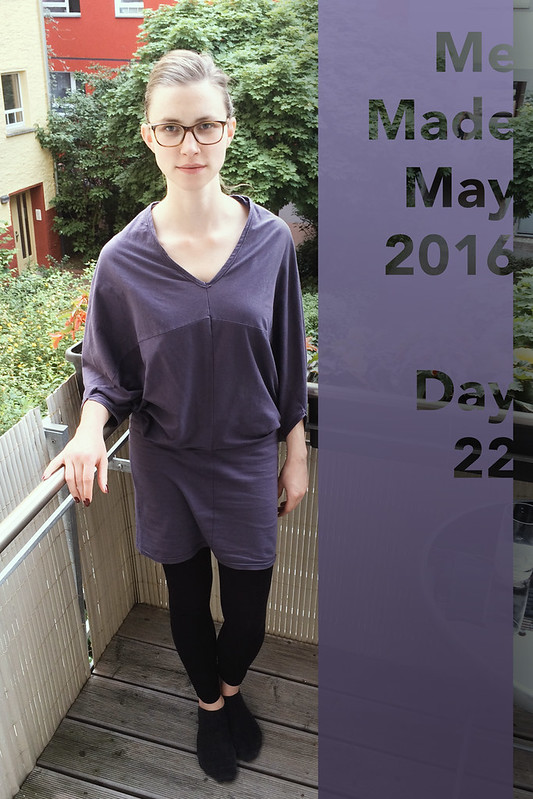
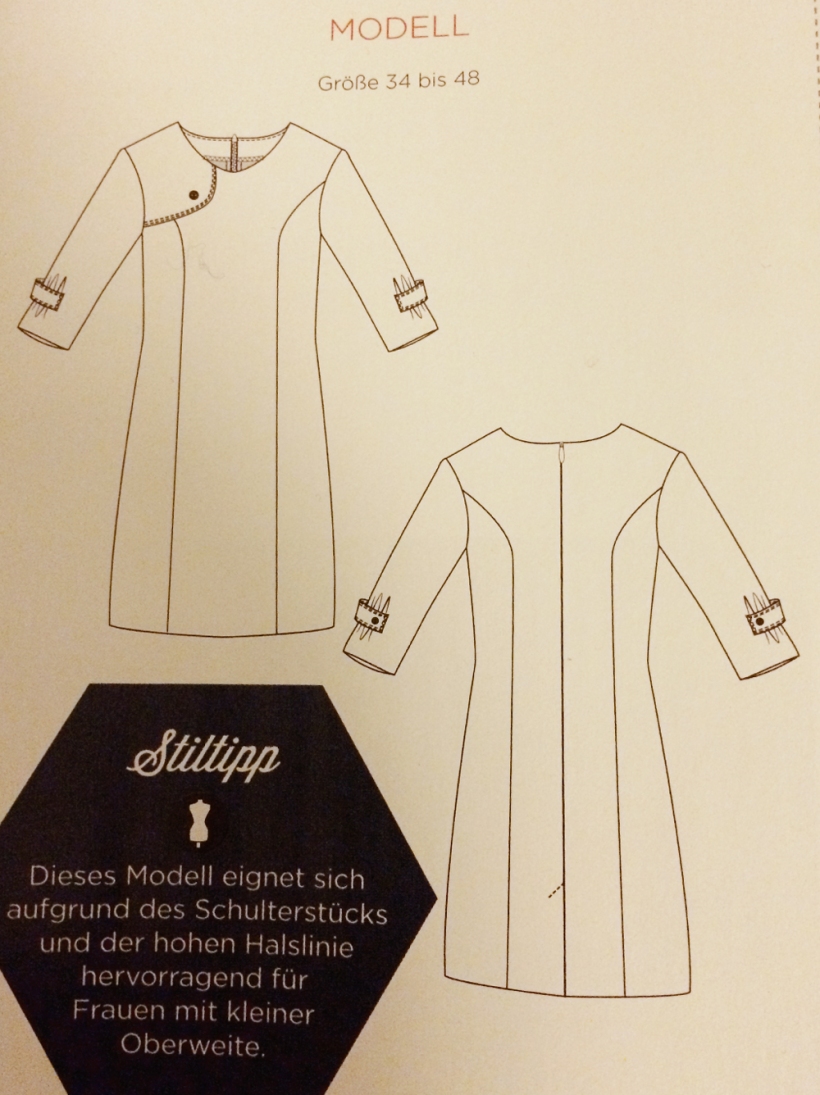
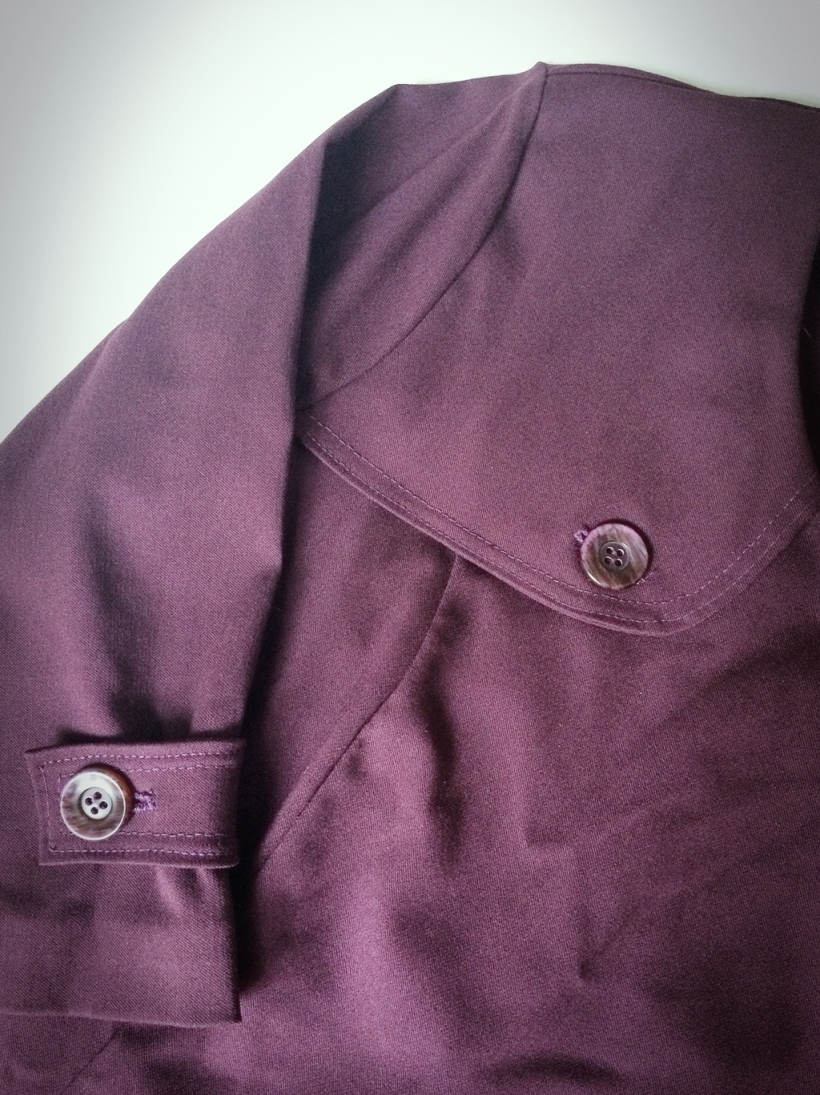
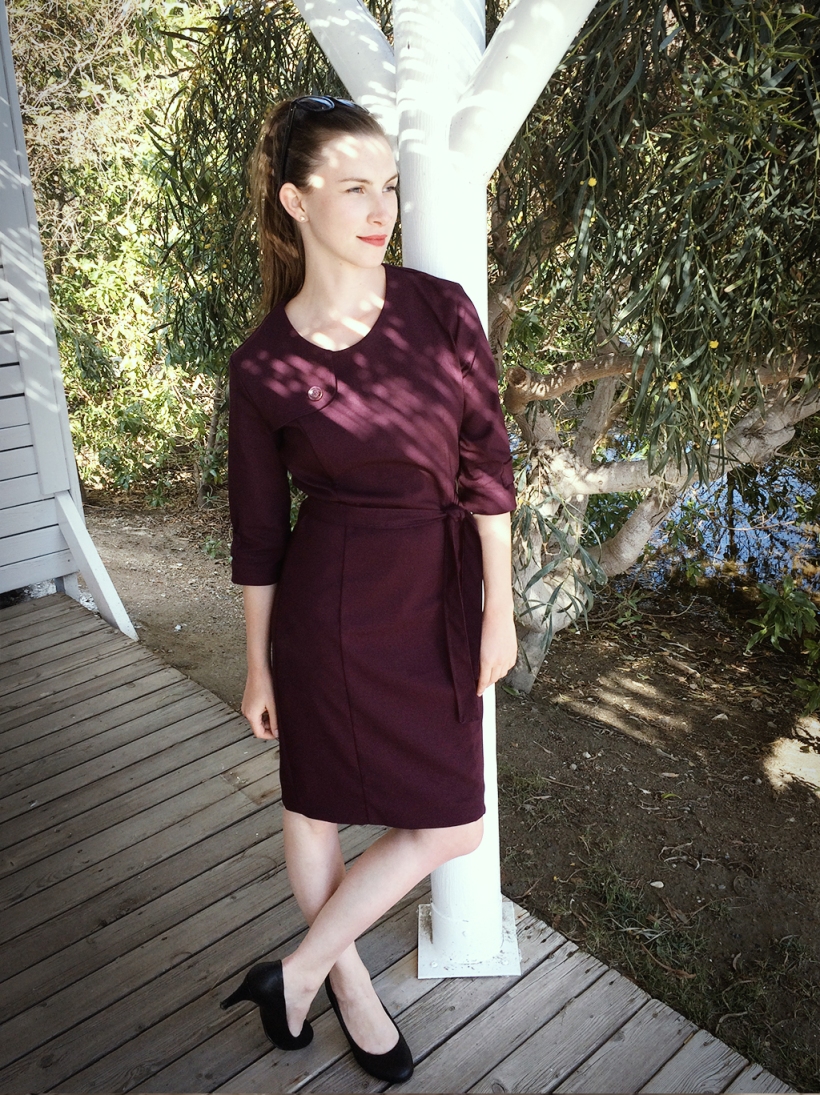
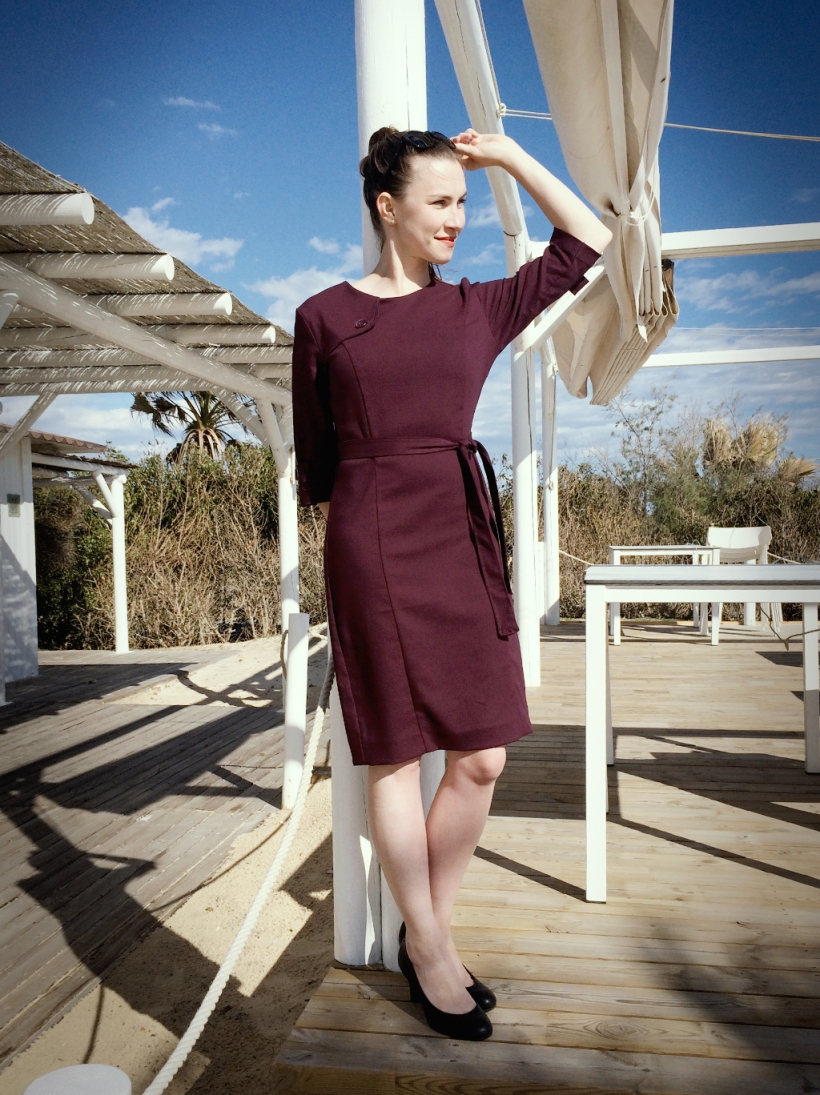
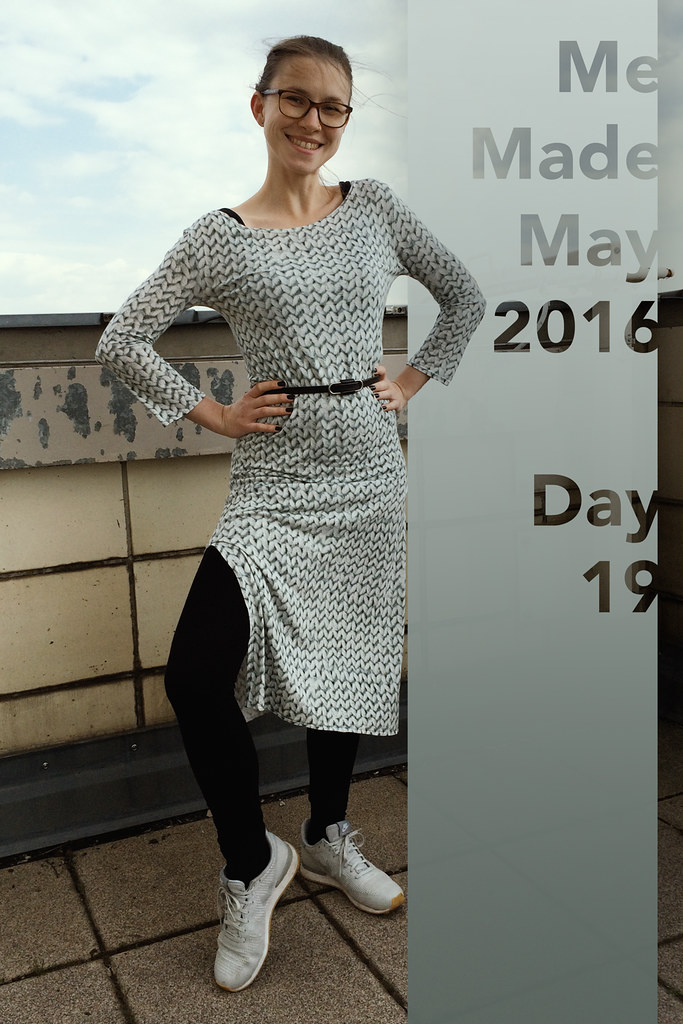
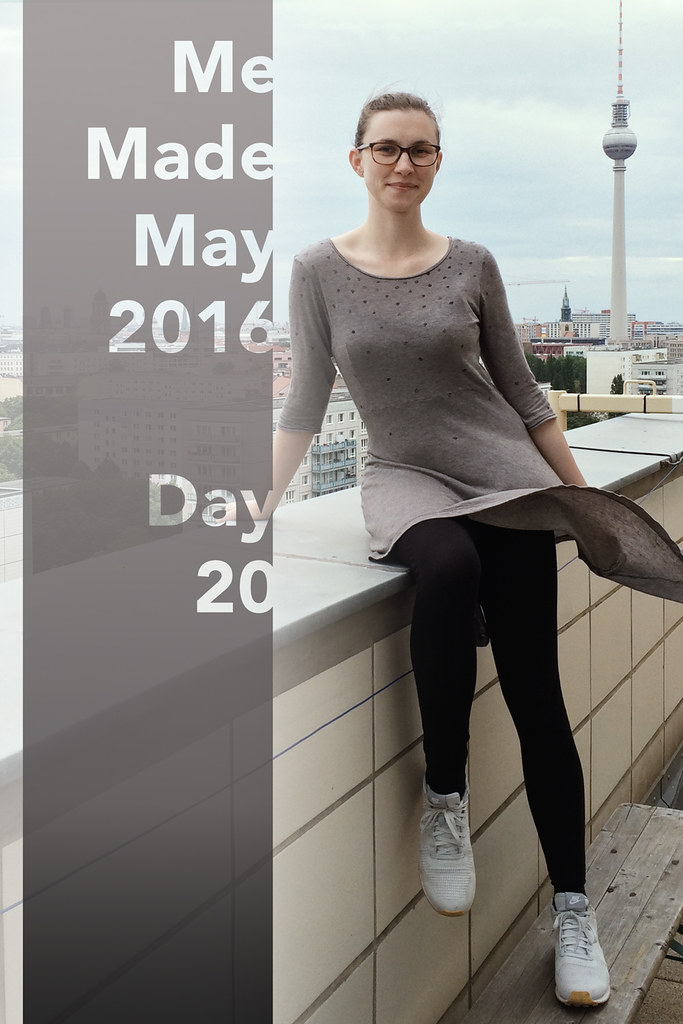
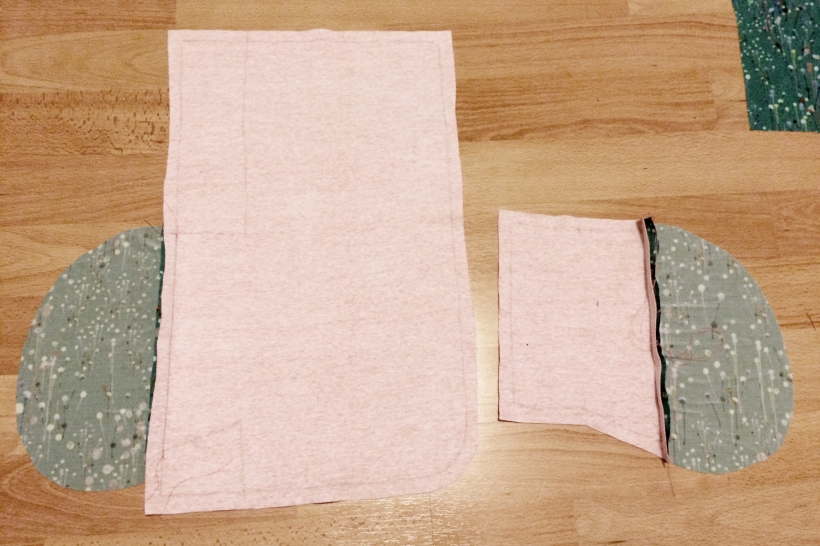
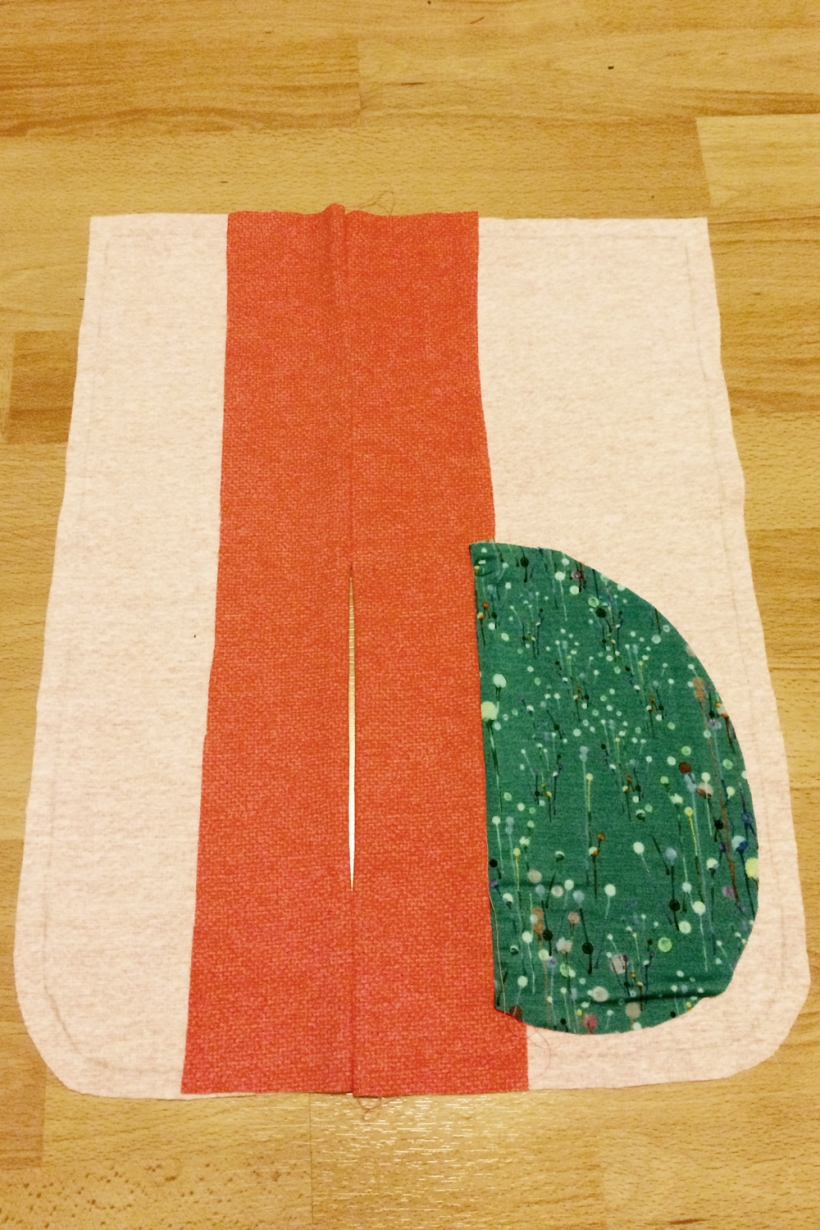
I got 1,8m of this sleek and heavy Jersey. That’s always enough to cover my tiny body. Since the print is quite busy I didn’t want it to be interrupted by to many seams. So I found the perfect pattern in a magazine, that I discovered when I got several issues for birthday from a dear friend (she knows me well) some years ago. It’s the CUT Magazine . This dress pattern called “Izzy” was in the latest and sadly last issue of the magazine, No. 14. A casual and comfy t-shirt dress with pockets! What I liked about the dress was the construction of the sleeves and the shapes of neckline and hem (round and angled in the front and angled and round in the back… I’ll just insert the line drawing and you will know what I mean 🙂 ) I made the smallest size with no alterations!

CUT_Kleid_08

The pattern isn’t designed for knit fabrics. They even used wool for their original version. I guess everything that has some weight will work. Meanwhile I did another version in a ponte knit (still not photographed, because there is so much more in the pipeline). It was a solid colour this time so I had to be more accurate with the top stitching. Yes, top stitching on knit fabric…it always seems impossible until it’s done 🙂

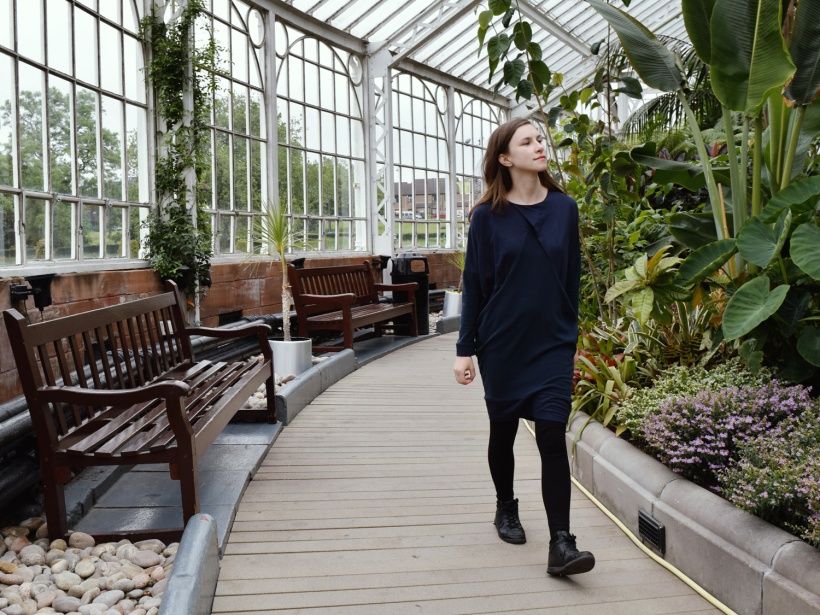
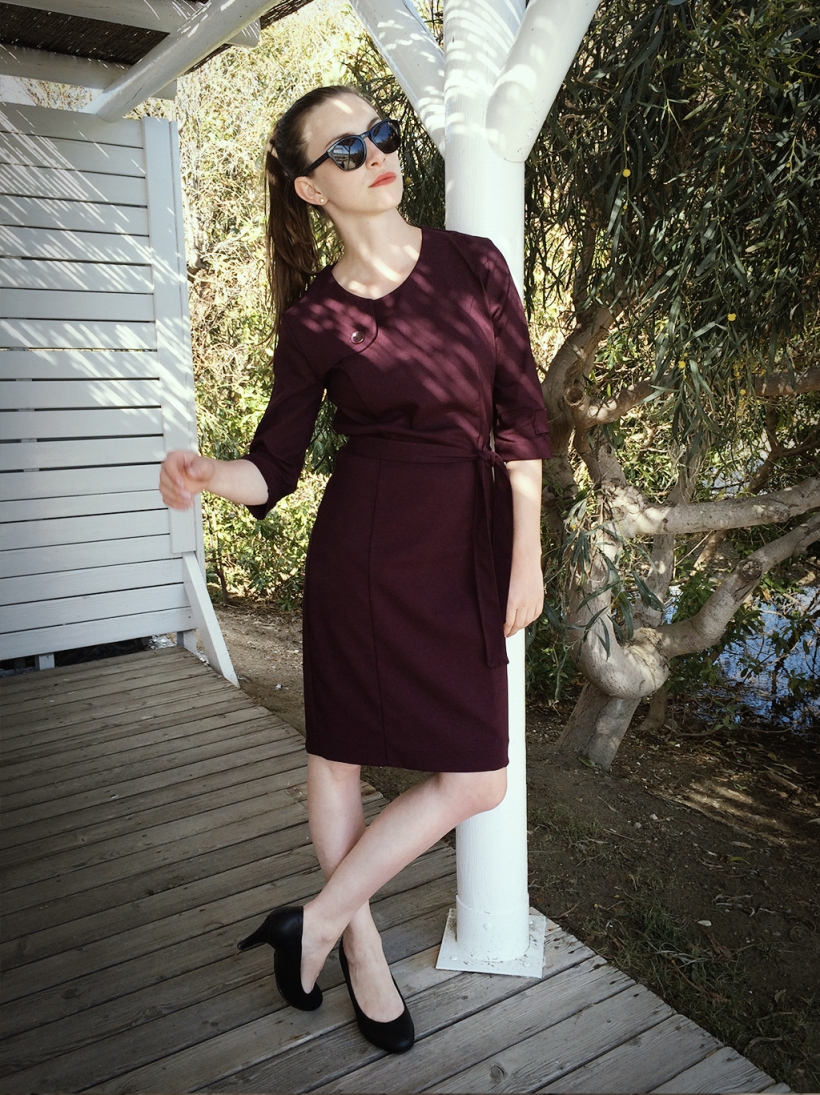
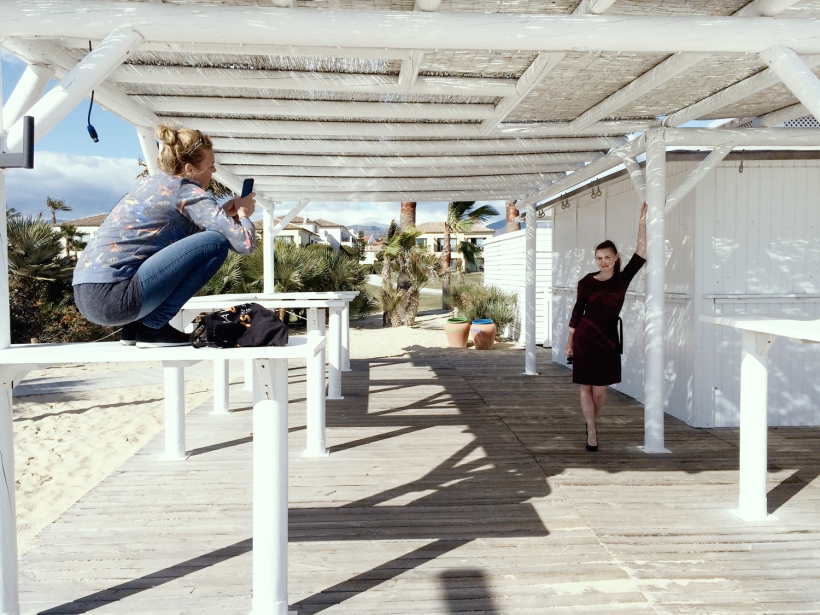
I wear this dress the whole year round! It’s is a very good travel companion because it doesn’t get wrinkled. And even if it would, the print would hide it 🙂 It was just last year when I finally got around to get it photographed properly, on a work trip to the lovely greek island Kos.

CUT_Kleid_01CUT_Kleid_02CUT_Kleid_03CUT_Kleid_05CUT_Kleid_06CUT_Kleid_07

Crazy Camouflage Cape Dress

I always wanted to sew a cape dress. By always I mean since the trend popped up in around 2012 or so. All my attempts to draft one failed sooner or later. Then I saw this beauty Very Purple Person made using a Boostrap pattern. It’s a pattern for knit fabrics… and you know I love to sew with jersey… Furthermore Novita has similar body measurements so I knew it would work with my body type (well… Bootstrap patterns are rendered according to your very own measurement so they are supposed to fit… but theres a difference between fit and fit…if you know what I mean)

I have to thank Novita not only for the inspiration but also for her tip to not get confused by the instructions wich are very misleading when it comes to the construction of the sleeve… or what a cape dress has where normal dresses have sleeves. I spent quite some time pinning and trying almost every possible way it could work… and I found one. I also adopted Novitas way of finishig the neckline.

The fabric was a very soft and stretchy rayon jersey. I bought it as a remnant on sale at my local fabric shop just around the corner (where I used to live some years ago). I went there with the mission to cheer myself up by touching (and potentially buying) nice fabrics. And those bright colours totally fit the bill. It was just 1.5m but with some pattern piece shuffling it worked out.

The warm temperatures in the desert of Chile were a good excuse to wear the dress. But with a tank top and some tights I could also wear it on my birthday  (It’s in July but that doesn’t always mean warm and sunny here in Germany)

DSC_0671DSC_0675DSC_0676DSC_0677DSC_0682DSC_0690DSC_0692DSC_0701DSC_0916DSC_0937

There are still two unblogged birthday-dresses in my closet. Hope to show them to you before there’s a third one 🙂

Evolution of my favorite pants

Until now you should be used to see different versions of the same pattern from me. This is the second attempt at Burda 6991 (meanwhile there is even a third one 🙂 ). As always I used the smallest size a 34 (which is actually a 36 printed at 90%). I had to take the waist in, so I lost about 10 cm of the circumference. I guess I don’t have to mention, that I shortened the legs as well.

I wasn’t able to find wide shoe laces when I made my first pair . But this time I had the right ones in my stash. They were attached to the sweat pants I used to make a comfy dress from.

The fabric is something synthetic that has a white sleek inside and a navy velvety outside with little white crosses. As most of my fabrics I purchased it for 2€/m at the fabric market at Maybachufer here in Berlin. Well, not exactly at the market… but in front of a bakery some metres down the street, that sells fabrics in front of their store on saturdays.

Burda6991_01Burda6991_02Burda6991_03Burda6991_04Burda6991_05

As you can see, I like to combine it with a simple striped top (some of the few things I regularly wear, but that’s not made by me) Perfect for a weekend trip to the lake…

Burda6991_06

… and even longer trips (This is the Uyuni Salt lake in Bolivia)

I photographed some more makes when I was on vacation in South America last year. I just have to find some time to put them up here.

I had to “skip” MeMadeMay this year. I fullfilled my vow to wear a different me-made garment each day. But that’s what I do anyway almost the whole year around. The biggest challenge, but also the thing that MMM is about for me, is to take a picture of my outfit everyday. I hope I can take part again next year. But first I have to blog more than 20 garments I made but didn’t document here yet.

Thank you for your patience (again 🙂 )

Lovely Jacket by Chance

For attending a wedding in April last year (seems like weddings are my second hobby beside sewing) I needed something to wear with my Ailakki Jumpsuit. There was an issue of Burda Easy  (autumn/ winter 2015) lying around ( I borrowed it from a friend, just to check if there is something interessting inside) There were some variations of a blouson jacket (I used version 4B). I thought this kind of jacket could easily be worn after the wedding too. I had some satin like fabric in my stash I bought in Porto several years ago. It was supposed to become a decorative element on a coat (I never made). I had my doubts, but the 1m was enough for the jacket. The fabric has a matt and a shiny side. The shiny side made it suitable for a wedding and matched the jumpsuit very well. The matt side gave a nice but not too hard contrast for the sleeves.

BurdaEasyJacket_001

BurdaEasyJacket_002

For the cuffs I used some matching jersey that was already in my stash too. It is a bit to soft for this purpose. But who cares if it looks so nice 🙂

BurdaEasyJacket_006BurdaEasyJacket_007BurdaEasyJacket_008.jpg

This easy jacket has some nice details like the darts at the neckline and the welt pockets. For the wedding I added a selfmade brooch.

ailakki09

Those nice shots (and the proof that this jacket has a life after beeing wedding guest attire) were takenin Edinburgh during our Scotland trip last year.

BurdaEasyJacket_003BurdaEasyJacket_004BurdaEasyJacket_005

Yay, I made a blog post before May 😉 Please stay tuned because there is some nice stuff in the pipeline ( I was quite productive in the last time…)

A big hug to all my readers!

A drapey lovestory

It’s no secret that I love the GBSB Drapey Dress. I loved it even before it was released (because COS sold the exact same dress).

drapeydressno4_03

I was very lucky that the pattern came as a free download. There are not many pattern pieces. So it was easy for me to figure out how to sew the dress. I didn’t miss the instructions. This time (well it’s the fifth one I made) I took pictures of my way of  assembling the dress.

step1_pockets
First I attached the pockets to the middle part of the front.

step2_back
Second (optional) step was to join my back of the dress. This step was only necessary because I used two types of fabric. One was the remnant from my mothers second Drapey Dress (a soft velvety fabric) and one was Jersey.

step3_upper-bodice-left
In the third step I added the upper left bodice part (including the back of the left pocket)

step4_upper-bodice-right
This was followed by the upper right bodice piece. If you want you can baste the fold at the neckline.

step5_shoulders
The fifth step is the shoulder seam.

step6_sleeves
If you go for the long sleeve version those sleeves are added in the sixth step.

Now you just have to close the side seams and add the neckline facing. I had to add a band at the hem because I forgot to lengthen the pattern this time. (I printed it out at only 90% of the original size to get my size. But that means I need to lengthen it a bit in my case)

The dress was the perfect option for the scottish weather. I wore it visiting one of my favourite places in Glasgow: the wintergarden next to the Peoples Palace.

drapeydressno4_06drapeydressno4_05drapeydressno4_02

The fourth version of this dress was a special one! I added invisible zippers to the seams in the upper bodice to create a nursing dress for a friend. And I was assured it works 🙂
I finished all hems with the twin needle using two different colours matching the fine stripes of the fabric.
anne_stillnchill

I guess this wasn’t my last one…

How often do you sew a pattern you like?

Merken

Jump (for my love) – Named Ailakki

I thought this 80ies classic is a good description for what this post is about. A jumpsuit made for the celebration of love (yes… I went to a wedding again 🙂 )

When I am invited to a wedding I try to match my outfit to the colour scheme. As the invitation shows, it was purple this time:


This very light and soft satin-like fabric was already in my stash. And the right pattern was chosen quickly. Previously I made several skirt and top combos and dresses for those occasions. It was time for a Jumpsuit. The Ailakki Jumpsuit from Named Patterns.

The delicate fabric was a bit hard to work with, but somehow it worked out. I used it for the lining too. Besides conquering the fabric, the fitting also was a challenge. I rarely make muslins  because I don’t spend much money on the fabric anyway and I see it as a part of the process to make it work in the end. I suppose the pattern is designed for a larger bust than mine (although it makes wearing a bra near to impossible). I had to take it in at the side seams of the bodice quite a lot. Some centimetres at the shoulder seams had to leave too. It feels like I spent some hours in front of the mirror pinning the bodice to my body to make it fit and to cover the bra properly. I don’t own a bra that sticks to your skin without any straps. A regular halterless bra wouldn’t work with the deep v-back. And sewing cups between the two layers of fabric wasn’t my weapon of choice, since the fabric is so thin and shiny, I was afraid it would definitely be visible. A have a bra with variable straps. I removed the shlouder straps and installed the one long strap that is hooked to the back closure and goes around your belly and back again. The closure sits beneath the back opening and the strap is covered by the waistband. I bought a matching invisible zipper but somehow it didn’t work out. So I went for a big visible one. I like the rough touch it adds to this rather fine garment.

I was not able (or willing) to take pictures of the jumpsuit outside in the daylight in Germany in April. But we were shooting in wonderful Adalusia in Spain where it was sufferable to wear outside. Our lovely make up artist loves her job and voluntarily did my hair, make up and the pictures during a shooting break.

ailakki07

ailakki04

ailakki06

ailakki01

ailakki02ailakki03

The wedding I made it for was on April 30th and the weather in Germany didn’t get as sunny and warm. So I made a matching jacket (There will be an separate post n this)

ailakki09

ailakki11

And finally I caught the wedding bouquet (the tradition says that I am the next to get married… stay tuned 😉 )

ailakki10

Over the summer I sewed some nice pieces but most of them aren’t photographed yet… but this will surely happen before I marry!!!

I’m still on the hunt for another jumpsuit pattern. Any suggestions?

Thank you very much for bearing with me! I hope to get back to a more frequent blogging rhythm 🙂

Namaste in full bloom

Yoga is my favourite sportif activity (Maybe because it doesn’t always feel like sport) And if you do Yoga it is good to have some pairs of nice Leggings. My newest ones are made of Jersey with a flowery print. (Made from my TNT pattern  “Roxy” from La Maison Victor Autmn 2014)

Yogaoutfit02

Finally I made the Sierra Bra from the free Pattern by lovely Madalynne. It’s my first attempt at sewing a bra (or underwear in general). But her sewalong was very helpful and left me very proud of my first piece of underwear. And it is so comfy that I like to wear it everywhere… and do Yoga.

Yogaoutfit01

sierra_yoga01

The third piece of my new Yoga gear is a simple shirt for keeping me warm during Shavasana. It is based on my selfdrafted hi-low shirt. I just added a wide band to the hem and left the sleeve hems and the neckline undone to give it a casual look.

Yogaoutfit03

And before I forget… the finale of Me Made May…

MMM2016_22
MMM2016_23
MMM2016_24
MMM2016_25
MMM2016_26
MMM2016_27
MMM2016_28
MMM2016_29
MMM2016_30
MMM2016_31
See you next May! (Well, I promise to show you some of my creations before that 🙂 )

Merken

French Trench

I call this dress French Trench since it is a trench dress from the magazine La Maison Victor (wich is actually Dutch…) Like my Leggings (1 & 2) and the Top of my last Christmas outfit the pattern is from LMV Autumn 2014.

Trenchdress01

I bought the fabric several years ago in Porto, Portugal. I have no idea what it is. Something synthetic with some stretch. It took me a while to gather all I needed (even if it just were 3 buttons and matching thread). But the sewing process was rather fast (the magazine has good instructions with many pictures)

Trenchdress_material

Trenchdress_Linedrawing

The styling tip says that this dress is good for women with a small breast because of the shoulder piece. And I, as a woman with a small breast, can say that it sits well in this area. I just had to shorten it a little bit (as a woman with short legs)

Trenchdress_detail

We shot the pictures when I was on a work trip in spain.

Trenchdress02Trenchdress03Trenchdress04Trenchdress05Trenchdress06

And here are some behind the scenes shots. I was told to shake it off, because my pose was too stiff… so I shook it off…

Trenchdress07

Trenchdress_BTS

I wore this dress on day 21 of Me Made May (it was the 60th wedding anniversary of my grandparents)

Here is what I wore on day 5 – 20:


I like big pockets and I can not lie…

The original lyrics say ‘big butts’… but big pockets are way more achievable for me 😉

I wanted to make a top or a dress with big pockets after I found some inspiration online. One was the lovely embroidered tee by Katy of katyandlaney.com.

embroideredtee

Another one was a picture of the Free People Zoe Sweater Dress I found on Pinterest

zoe dress

I accompanied a friend to the fabric market at Maybachufer here in Berlin. I didn’t need something special. I went home with some neon yellow lace (it was only 2€/m and perfect to try the Sierra bra pattern), soft and fluffy fleece with sweet little animals (to make a gift for a little baby boy) and a remnant of a black and red patterned synthetic fabric (obviously the leftover from the fabric Wiebke of Kreuzberger Nähte bought to make her Lady Skater dress)

Katy drafted the pattern for her embroidered tee herself. But since I am a lazy sewer I was looking for a pattern to start with. I had something lose or boxy in mind. In my archive of Burda magazines I found this vintage blouse pattern (No. 109 from 12/2011) I was curious how the sleeves may turn out, since they have a rather unconventional construction. I traced the smallest size (36, a bit bigger than I usually need… but I wanted it a bit lose anyway) and added only a little seam allowance. My fabric was less than 1m long but I managed to put all pattern pieces on it and had a little rest for the pockets.

BigPocketSweater_WIP

Now I had to decide how the pocket should be shaped. I considered pockets with round (like Katys) or angled corners and made paper pieces to try it out.

BigPocketSweater_PocketShape

After I decided for the angled ones, I experimented with the size.

BigPocketSweater_PocketSize

I didn’t use the pattern pieces for the collar and the waistband. I just used a folded stripe of fabric the length of the circumference of the neckline to finish it and hemmed the lower edge of the top. Finally I made and attached the pockets. I sewed them in place at the upper edge and secured them by hand in some spots.

I was very lucky to pack my brandnew top for my work trip to Andalusia. The weather was nice and sunny but there was also a very strong breeze.

BigPocketSweater05BigPocketSweater04BigPocketSweater03BigPocketSweater02BigPocketSweater01

I wore it on day 4 of Me Made May and here is what I wore the other days:

MMM2016_01
MMM2016_02
MMM2016_03 MMM2016_04
How is your Me Made May going?

Long way to Castelbajac

I finished an UFO (unfinished object)! (And to write about it, took me almost as long as the sewing process) It all began with a coat from J.C. de Castelbajac. I pinned it to my Style pinboard at Pinterest because I liked the collar. Buying that coat was not an option. I don’t spend that much money on clothes for myself. But I thought about adding this style of collar to a selfmade garment. And then Burda read my mind.

I always check out the patterns Burda offers with every new issue and I browse the member projects of burdastyle.com, burdastyle.de and burdastyle.ru (sometimes even the Polish website)  – Let’s praise Google Translate at this point 🙂 And there it was. A dress pattern from Castelbajac with the collar and the giant pockets of the beloved coat. But there was a realization too: Burda doesn’t sell it’s designer patterns as a download. So I had to order the printed magazine from december 2014 and trace the pattern pieces from the pattern sheet (did I mention that this is the part of sewing I dislike the most?… followed by ironing…) The pattern was marked as ‘masterpiece’ but I thought with the power of the internet I will manage to sew this dress. The internet told me, that the most complicated part are the pockets. I read everything I could find about it at this point (most of it in french) Burda instructions aren’t very helpful (even in your native language). Everything was cut out and the pockets were assembled.

I made pictures of every step (and thought: There is a fine line between genius and insanity… who thinks of a construction like this?)

pocket_castelbajac01pocket_castelbajac02pocket_castelbajac03

Now it was time to put the pockets and the rest of the dress together. The instructions were confusing and so I tried to do it my way (the ‘try and error’ way…) and ended up with the two pockets sitting at different hights… in 2cm different hights… while ripping it up again, I realised I chose a bad fabric for this one. It called for something like wool. But I wanted to have this dress in a very soft (and very stretching yet not very stable) printed sweat something (stash busting…a resolution that’s not always the best idea)… I had to be very careful because you saw every stitch I made before and the fabric ripped very easily.
And then I moved and forgot about the dress for a while (because I didn’t want to wear a lined sweat dress in summer anyway)
When my sewing stuff found it’s place in the new sewing room I took courage again and wanted to finish this dress. I managed to set the pockets in at the same hight (but still not in the way the instructions told. Because 1. I just understood them, when I found this helpful picture from Marie-Noellep2250155 and 2. that wouldn’t have worked with my fabric anyway)

When I was about to assemble the lining I realized that I made a mistake when cutting out the front and back pieces…the instructions said ‘cut the same pieces as for the main fabric’… and so I cut the same…with the openings for the giant pockets…which the lining is supposed to cover from the inside…

During the process I found out that my main fabric is quite transparent and so I chose another, lighter fabric for the linig (not the green splattered one I already used for the pocket bags) The rest went relatively smooth ( well, there were already enough disasters for one dress)

I like my very own Castelbajac dress and other people seem to like it to (they even tell me so 🙂 )

castelbajac01

castelbajac03

castelbajac04

castelbajac02

In the end the lucky cat was with me 🙂

Do you have UFOs like that? Isn’t Me-Made-May a good occaison to finish them (or to write about them… I still have some UBOs – unblogged objects)